You have barely nailed up a gorgeous piece of woodworking, and are now staring at it, pondering the old perennial question: how long does how long does wood glue take to dry? It’s a crucial moment. Do you wait an hour? A full day? The fact is, there is no one and simple answer. Drying Wood glue Drying time varies depending on a myriad of factors, including the type of glue you apply, as well as the air you breathe. Get it right, and the joint you are putting together lasts a generation or more. Get it wrong, and you find when you remove the clamps you have a joint that does not work.
This guide is present to put the guesses out of the process. We will go through all the details regarding the drying and curing of glue and will transform you into a hesitant amateur into a self-confident crafter. Let us de-romanticize the process so that you would know when your project is all set to take the next step.
Drying Versus Curing Explained
Is different from curing, which must be understood before discussing timetables. This notion is especially important for calculating wood glue drying time. Dry glue means it has set sufficiently to keep the components together and you can safely remove the clamps. You may move the project gently since the joint is solid with your fingertips. Curing is still occurring in the joint glue. The entire curing phase of wood glue is when the adhesive is totally strong and chemically reacted. An adhesive junction may be dry enough to work with in 30 minutes yet take 24 hours to become rock-solid. Like a cake, the tooth pick may be clean (dry), but it must chill (cure) before frosting.
Popular Wood Glue Types
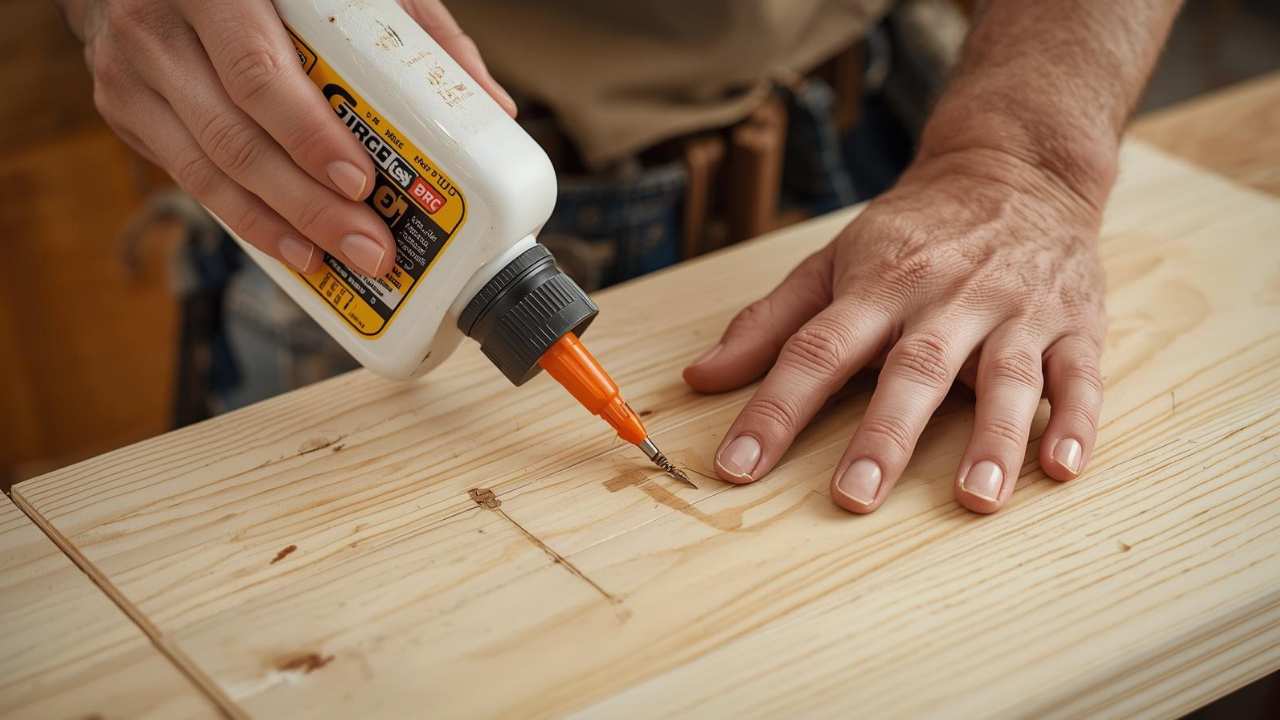
What type of glue you are taking off the shelf is a big deal on your project schedule. Let us deconstruct the most common ones that you will find in your local hardware store. Most woodworkers use PVA Wood Glue (such as the original Titebond or the Elmer Carpenter Glue). It is simple to operate, easy to wash with water and provides a very high bond strength. A common PVA glue will cure within approximately 30-60 minutes and be fully cured within 24 Hours. The second one is Polyurethane Glue which has brands such as Gorilla Glue. This glue is latex-like and it expands when it dries and it needs moisture to be activated. It works well on outdoor projects since it is waterproof but it may be a mess.
The time it takes to dry like PVA is the same, however, it is recommended that it be clamped at least two hours. Cyanoacrylate Glue (Super Glue) and Rapid-Set Epoxy special are your best bets to be used with the fastest results.
They can be set in a few seconds or several minutes, which is ideal in fast repairs, but is not always suitable when dealing with large woodworking joints on account of cost and weakness.
Checking If Glue Is Dry
Without risking a broken joint how long does wood glue take to dry know whether your project is good to go to the next step? Safe and effective methods are few. The most used visual inspection is to examine the glue squeegee at the seam. When the paste that leaked out of the joint has ceased to be of the milky white colour to become a translucent or clear colour and is solid to the touch, then that is a good indication that the initial drying period of the adhesive is over. Another trick to feel the joint is to use the knuckle of your finger to lightly tap the wood, when it sounds solid and united that is a good bond, and when it sounds rattling or hollow then there is a problem. Patience though is the best test of all.
A scrap of wood that you have can be used to make a test joint during the same time as your work. You can work with this piece of the test when you believe that the glue is dry but do not break your project. This provides you with a sure method of establishing the strength with all the safety without any of the danger.
Speed Up Drying Process
At times you are just in a hurry and you need to get things moving. Though patience is indeed always the golden rule, a couple of safe methods of causing the process to progress a little faster are possible. Controlling your environment is the best means. The safest way of shortening the time of bonding of the wood glue is by taking your project into a warm, dry room. A fan can also be used to circulate air around the project, and this circulates the moisture of the water-based PVA glues. It is imperative to resist the urge of putting a hair dryer or heat gun on a high level, though.
The use of strong, intense heat can also either make the glue bubble, over-skin (entraping the moisture in the skin), or can weaken the chemical structure of the adhesive itself. When you have to apply heat, you should set it to its lowest possible level, and move it continuously, although air circulation is always a safer choice.
Achieving Full Glue Strength
Keep in mind here that the clamps have been taken off but this does not mean that your joint is fully powered. Here it is crucial to know how much time it takes wood glue to cure completely. A full cure time will be 24 hours with the majority of the standard PVA wood glues. This does not imply that you can subject your project to any serious stress (such as sitting on a freshly-repaired chair, planing joint flush, or sanding it brutally) before a day has elapsed. One of the major errors is sanding too soon; your sandpaper can get all gummed up by gluestick and the connection may even loosen because of friction and heat buildup before it is completely clamped. Allowing the glue time to dry means the chemical reaction is complete and the bond is as strong as the wood fibers surrounding the bond.
This is merely a matter of patience that will make the difference between amateurish and professional-quality workmanship that will last throughout the lifetime.
| Phase | What It Means | How It Feels & Looks | What You Can Do |
| Initial Set (Tack) | The glue is “grabbing” and forming its first bond. It’s like the glue is holding on for dear life. | The squeeze-out is still a bit tacky but has skinned over. The joint is fragile. | Absolutely nothing! The clamps must stay on. This is the “don’t you dare touch it” stage. |
| Dry / Clamp-Free | The glue has hardened enough to hold the pieces together without help. It’s like a cake that’s firm on the outside but still gooey inside. | The glue squeeze-out is hard and translucent. You can’t dent it with a fingernail. | You can safely remove the clamps and carefully move the project. But don’t stress, sand, or use it yet! |
| Full Cure | The chemical reaction is 100% complete. The glue has reached its maximum, rock-solid strength. The cake is now fully baked and cooled. | The joint is as strong as the wood around it. There’s no visual difference from the “dry” stage. | Go for it! Sand it, plane it, stain it, or sit on that chair. Your project is ready for action and stress. |
| Fast Glue vs. Strong Glue | Fast Glue (like Super Glue): Sets in seconds for instant repairs. Strong Glue (like PVA): Creates a permanent, structural bond. | A fast glue joint might feel rigid immediately. A strong glue joint needs time to become truly unbreakable. | Use fast glue for quick fixes on non-structural pieces. Use strong PVA glue for furniture and projects that need to last. |
Conclusion
The knowledge of the duration that the wood glue has to dry is a combination of science, patience and experience. It is not a question of just looking at the clock but being able to know the distinction between being dry and being healed. Between the kind of glue you use and the temperature of your shop, there are a lot of things that are involved in the end result. The golden rules are straightforward, follow bottle instructions, clamp minimum of an hour and wait 24 hours before subjecting the joint to any actual stress. You make sure that the relationships you build are well-built, durable and worth the effort that you put in to developing them, by respecting the process and giving your project the time it deserves.
And the next time you use that glue you can be absolutely sure of what is going on and when you can count on your masterpiece being finished.
FAQ’s
1. What’s the difference between dry and cured?
When the glue is dry it has hardened to the point that the glued pieces cling together and the clamps can be removed. Cured refers to the glue having attained maximum strength, or its full strength, and this takes a lot longer. A joint may be dry in an hour and may require 24 hours to completely heal.
2. How long should I clamp my project?
For most standard wood glues (like Titebond), you should keep the clamps on for at least 30 minutes to an hour. For larger or stress-bearing projects (like a chair), it’s better to leave them on for 2 hours or more to be safe.
3. What is the biggest factor that slows down drying?
Cold temperatures are the biggest culprit. Glue dries best at room temperature. A cold garage or workshop can dramatically slow down the drying and curing process, so try to work in a warm space.
4. How can I tell if the glue is dry?
Check the glue that squeezed out of the joint. If it has turned from a milky white to a translucent or clear color and feels hard to the touch, it is almost certainly dry enough to remove the clamps.
5. Can I use a hairdryer to speed it up?
It’s not recommended. High, direct heat can cause the glue to bubble, form a crust while trapping moisture underneath, or even weaken the bond. A fan to circulate air in a warm room is a much safer and more effective method.